Refurbishing Antique Furniture: DIY Ideas to Create a Stylish Vintage Decor
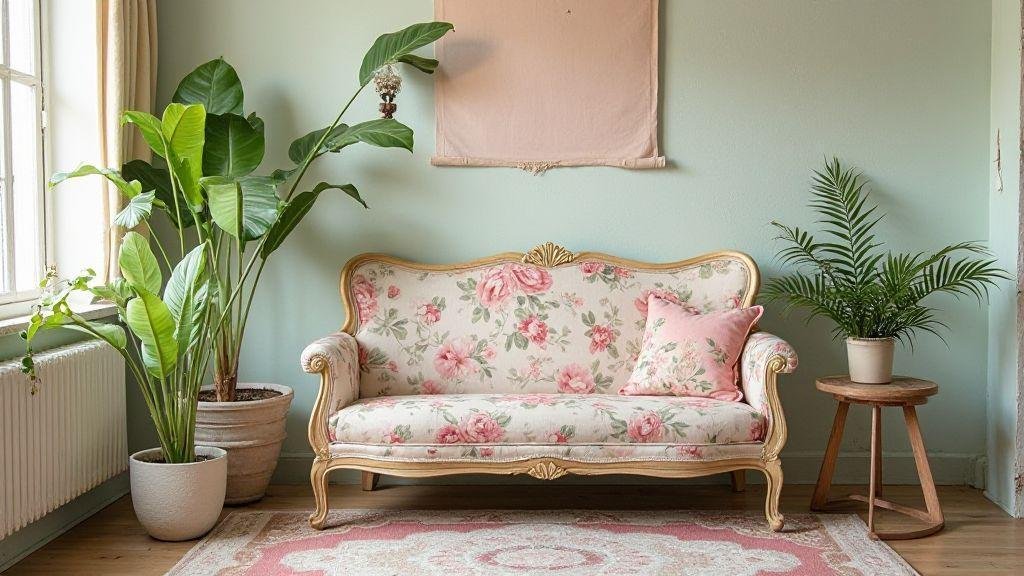
Restoring Old Furniture — A Complete Guide from Planning to Finishing
Restoring old furniture will show you how to plan and execute a complete renovation, from assessing the condition of the pieces to choosing the right style, budget, tools, and materials. You will learn about stripping, sanding, using paints and varnish, when to glue or replace parts, upholstery techniques, upcycling ideas, and maintenance care for a safe and long-lasting finish.
Key Takeaways
- You can renovate furniture with sandpaper and paint.
- You can use wax or patina for an aged effect.
- You can swap hardware for vintage pieces to change the style.
- You can mix old furniture with modern items for balance.
- Always test paints and finishes in a hidden corner before applying.
Plan Your Furniture Restoration Before You Start
Before getting your hands dirty, draw a clear map of what you want. Think about how the piece will be used, where it will go, and what result will make you happy. A good plan avoids surprises, uses less material, and lets you work with more confidence. And remember to take breaks — a short pause for an afternoon snack helps maintain your rhythm without losing precision.
Check how much time you have available and how much you are willing to spend. Break the project into stages: cleaning, repairs, finishing. This way you can see priorities and decide whether to do everything yourself or bring in professional help for the more technical parts. Also think about the visual impact: a well-restored piece can become the focal point of a room. Choose references, save photos, and note measurements. With this, your furniture restoration becomes less trial and error and more a safe path to the finished piece.
How to Assess the Condition of a Piece for Restoration
Start by checking the structure: test drawers, doors, and legs. Look for termites, rotted wood, large cracks, or loose glue. For old furniture restoration, the structural integrity is what determines whether it’s worth investing time and money.
Check the finish: chipped paint, dark varnish, loose wood veneers, or rusty hardware. Take photos of the problems and mark what needs to be removed, what can be repaired, and what must be replaced. This avoids unnecessary purchases.
Define Style, Budget, and Time for Your Furniture Restoration
Choose a clear style before starting: rustic, modern, vintage, or minimalist. This guides the choice of paint, hardware, and techniques. Having a style helps you keep the project coherent and avoid last-minute changes that extend the timeline.
Put together a realistic budget with a margin for the unexpected — about 15% to 20% more than planned. Estimate time per stage and leave room if it’s your first project. Prioritize what is essential for use and what is just aesthetic detail so you don’t lose focus.
Basic materials and safety checklist: sandpaper (coarse and fine), scraper, brushes, rollers, varnish or paint, wood filler, wood glue, new hardware, cloths, and personal protective equipment such as gloves, safety glasses, and a dust mask. Work in a well-ventilated and clean environment.
Essential Tools and Materials for Stripping and Sanding
You will need basic equipment before starting any furniture restoration project: a drop cloth to protect the floor, sandpaper in various grits, hand scrapers, spatulas, and at least one electric sander (an orbital sander is an excellent choice). Use chemical strippers with adequate ventilation and always follow the manufacturer’s instructions.
Organize your workspace with a stable workbench, good lighting, and a bag for waste. A well-set-up environment speeds up the process and prevents mistakes.
Sandpaper, Scrapers, and Electric Tools for Stripping and Sanding
Sandpaper is your main ally: start with coarser grits (60–80) to remove layers and move to 120–220 for finishing. Use a sanding block on flat surfaces and detail sandpaper for corners. For sensitive surfaces, wet sandpaper or fine steel wool helps avoid marks.
For electric tools, the orbital sander is versatile; the detail sander reaches corners; the multi-tool handles small areas. Less force and short movements generally produce a more even finish.
Paints, Primers, and Products for Repainting Furniture and Varnishing
When choosing paints, think about how the furniture will be used: chalk paint gives an aged look; acrylic is easy to clean; enamel offers durability. A suitable primer creates adhesion and prevents staining. For resinous woods, an alcohol-based primer or shellac sealer is usually the best bet.
For finishing, polyurethane varnish provides lasting protection; wax gives a soft touch; oil enhances the wood grain. Apply in thin coats and lightly sand between coats. Always test in a hidden spot to avoid incompatibilities.
Where to Buy Supplies
Look in woodworking shops, building supply stores, and specialized online retailers. Local workshops and carpenters sometimes sell small quantities and recommend reliable brands.
Wood Restoration Techniques Step by Step
Start with inspection: termites, cracks, discoloration, and old varnish. Note what can be saved and what needs replacing.
Next, cleaning and stripping: remove dirt with mild soap and a soft pad; do chemical or mechanical stripping only where necessary. Always test the method in a hidden area.
Then move to sanding, repair, and finishing: level with the correct grits, fill with filler or glue loose pieces, and finish with varnish, oil, or wax. Work in short stages, respect drying times, and check the result in natural light.
How to Strip Safely Without Damaging the Wood
Do a test in a hidden corner. Use protection (glasses, gloves, mask) and ensure ventilation. If using a chemical stripper, follow the manufacturer’s action time and remove residue with a plastic scraper. If using heat, keep the tool moving to avoid burning the surface.
Correct Sanding: Grits, Direction, and Finishing
Start with a coarser grit only where there are irregularities and move to finer grits (for example: 80 → 150 → 220). Always sand in the direction of the grain. Remove dust between stages with a damp cloth or vacuum and do a final wipe with a microfiber cloth before finishing.
When to Use Glue, Wood Filler, or Replace Structural Parts
Use glue (PVA or epoxy) on loose joints; apply pressure with clamps until dry. Prefer wood filler for holes and surface chips. Replace parts when there is rot or loss of structural function — glue does not fix a support that gives way.
Repainting Furniture and Choosing Varnish and Finish
Repainting starts with an honest diagnosis: check for cracks, termites, or loose glue. Sand where the paint has chipped, clean the dust, and repair cavities with wood filler before applying paint.
The choice of varnish depends on use: for tables and chairs prefer polyurethane or high-resistance acrylic varnish; for decorative pieces a matte finish can hide imperfections. Test in a small area to evaluate color and shine under the room’s light.
If you are restoring old furniture, also think about maintenance: hard varnishes resist scratches but are harder to touch up; water-based varnishes dry quickly and yellow less. Work in thin coats and respect drying times.
Choosing Paints and Primers for a Durable Repaint
Start with a suitable primer: shellac blocks stains and acrylic primer improves adhesion. For furniture that receives constant cleaning, choose water-based enamel paints or good-quality synthetic enamel. Paint in thin coats, lightly sanding between coats.
Types of Varnish and How to Apply for Protection
There are solvent-based and water-based varnishes. Water-based polyurethane dries quickly and yellows little; oil-based polyurethane is harder. For damp areas, consider marine varnish (spar varnish).
Apply with a quality brush or spray gun, 2 to 4 coats, lightly sanding between coats with 320-grit sandpaper. Work in a clean environment; dust on fresh varnish ruins the finish. For an ultra-smooth finish, use wipe-on varnish in thin coats.
Tricks for a Smooth, Brush-Mark-Free Finish
Use the right brush (synthetic bristles for water-based, natural for oil-based), apply thin coats keeping wet edges, and sand between coats (320–400). Wipe with a tack cloth before the final polish with a light wax or microfiber cloth.
Upholstery and Artisan Woodworking Touches
Transform a tired piece with well-planned upholstery and simple woodworking. Assess the structure: slats, springs, and loose legs compromise comfort. Choose foam of adequate density and a well-fitted batting layer.
Changing the fabric changes the soul of the piece; durable linen or washable microfiber are good options depending on use. Reinforcing joints and fixing the base before covering avoids rework.
How to Renew Seats and Choose Upholstery Fabrics
Remove the seat and check the foam and base. Replace deformed foam with adequate density (sofa: medium to high). Measure and photograph layers before disassembling.
Choose fabrics thinking about cleaning and durability: cotton and linen breathe well; synthetics and microfibers clean easily. For homes with children or pets, prefer washable fabrics with stain-resistant treatment.
Reinforcing and Repairing Structures with Artisan Woodworking
Reinforce joints by carefully removing old glue, aligning, and reapplying wood glue with dowels or hidden screws. Use clamps until dry. For cracked wood, replace only the compromised part when possible; add support slats to seats if needed.
Materials, Staple Guns, and Stitches Used in Upholstery
Have on hand foam (various densities), batting, elastic webbing, staple gun, curved needle, strong thread, and appropriate glues. Common stitches: straight stitch, backstitch, and invisible stitch.
Upcycling Ideas and Vintage Decoration with Style
Give new life to a piece with little investment and creativity. Identify sentimental value or good structure. A scratched dresser becomes a star with paint, new hardware, and patina.
Transform functions: a shoe rack into a bar, a bedside table into a plant niche. Replacing a top with glass or applying fabric to shelves changes everything. Use bold colors on focal points and keep the rest neutral for balance.
Upcycling is a practical form of old furniture restoration, reduces waste, and preserves stories — grandma’s table can become a coffee corner.
Transform Old Pieces into New Furniture with Upcycling Techniques
Start with cleaning, structural assessment, and small repairs. Sand, apply glue to cracks, and fill holes. A good primer makes paint adhere better. Old hardware can be cleaned or replaced with pieces full of personality.
For finishing, choose chalk paint for a rustic touch, decoupage for details, or varnish for protection. Swapping fabrics and linings instantly refreshes the piece.
Combine Restored Furniture in Vintage and Modern Environments
Mix eras with a color palette that ties the pieces together. A vintage cabinet in white or gray next to a modern wooden table creates balance. Prefer one focal point per room to avoid visual clutter.
Embrace contrasts: a contemporary lamp over an antique table, a geometric rug under a vintage sofa. Play with proportion and textures: metal with wood, linen with leather.
Care and Ongoing Maintenance After Furniture Restoration
Keep the piece away from direct sunlight and humidity. Clean with a dry or lightly damp cloth, reapply wax or varnish as needed, and regularly check screws and joints. Small adjustments prevent big repairs later — and after a day of work, nothing beats a practical dessert or a cornmeal cake to celebrate the renewed piece.
Conclusion
Restoring old furniture is, above all, about planning: defining style, budget, and time avoids headaches. With a clear map, each stage becomes a safe step — from stripping to finishing.
Small choices make a big difference: a good combination of sanding, primer, paint or varnish, plus attention to safety, ensures a long-lasting result. Swapping hardware, reinforcing joints with glue or filler, and investing in the right upholstery transforms the piece without reinventing the wheel.
Think of the process like a recipe: test in a hidden area, work in layers, and let the curing time be part of the process. Upcycling is the creative seasoning; periodic maintenance keeps your work of art functioning day to day.
Get your hands dirty and enjoy — you have the chance to give new life to furniture full of history. To learn more about who is behind this content, visit our About Us page and, if you’d like to know our policies, see our Privacy Policy and Terms and Conditions.